
8×12 Shed Blueprints |
8×10 Shed Blueprints |
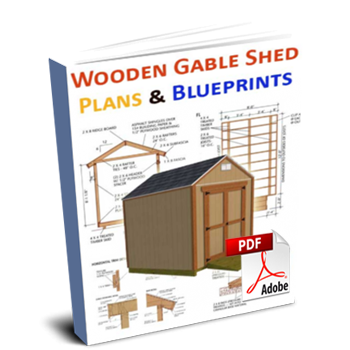
10×12 Shed Blueprints |
12×16 Shed Blueprints |
Have you ever tried to build a project without the right outdoor shed blueprints? You may feel that you can finish the project easily, but if you don’t have the proper plans for building a shed, building a shed in your garden is not that easy. You can end up making a lot of mistakes. However, you can save yourself a lot of money and efforts if you only start working on the project once you have the right shed blueprints.
It is not that hard to construct a shed as it does not need much woodworking experience. However, you will definitely need accurate plans so that you build the shed in the correct manner. It doesn’t matter how you are going to use the shed, it must always be sturdy and also protect its contents from the elements. Many people store their gardening tools inside the sheds. Some store their grill and barbecue inside their shed, while some other even convert the shed into a playhouse for their children.
Blueprints For Constructing a Shed The Easy Way
If you don’t get the measurements for the shed correct the first time, it can end up costing you a lot of money and efforts to buy new timber and cut it all over again. You could also end up building a shed which is out of proportion and ugly. Make sure your plans give accurate measurements for each of the components of the shed.
If you are an experience craftsman, you could even draw up your own shed blueprints. If you are not that skilled at woodworking then you can also get the plans drawn from an experienced handyman, or buy the shed blueprints from your local DIY store. You can also search online for free shed plans. Ensure that the plans are as detailed as possible to make sure you make no mistakes in the measurements or alignment of the various joists and rafters.
Building a shed is a great DIY project and a woodworking adventure. A shed will add to the value of your property and also act like a second home to you. Once you have the right blueprints, building a professional looking shed in your own backyard or garden is not a hard task. Just make sure you pick the right shed design to match your house and landscape.
Don’t waste your time trying to figure out how to build a shed for your garden. Get hold of the best storage shed plans so that you can begin working on your project without wasting time.
Here are the basic components which will be involved in the building of a shed.
Shed Foundation & Floor Blueprints
- Compact Gravel – For laying the foundation
- Timber Skids – Pressure Treated 4 x 4 inch posts for setting the floor joists.
- Floor Joists – These boards are used for framing the shed floor and ceiling.
- Rim Joists – 2 x 6 inch joists that become the outside frame or rim of the shed floor.
- Angled Metal Clip – These are fasteners made of galvanized metal used for anchoring the joists at right angles to the 4 x 4 skids.
- Plywood sheathing – Pieces of plywood which come with an extension along the longer edge of the sheet on one side. There is a corresponding “groove” on the other side of the sheet for fitting the tongue.
Instructions For Framing the Shed Wall
- Plate –There are wooden boards nailed or screwed horizontally along the bottom, or along the top of a wall on which the studs, rafters or joists are fixed. Commonly the plate is a 2 x 4 board but it could be wider according to the shed design.
- Studs – These are boards of size 2 x 4 or larger which are fixed vertically along the center. They give the wall additional strength and provide a surface on which the siding or sheathing can be attached.
Crafting Windows and Doors For Your Shed
Header for Doors and Windows – Timber boards are generally fastened along the edge with plywood in between, for forming the top of the opening for doors and windows. The header strengthens the top of the opening.
How To Create The Shed Roof From Blueprints
- Rafter Framing – Using 2 x 6 boards or other appropriate size as per the design, the roof frame for the shed is first constructed
- Ridge Board – The board which runs along the center of the roof at the top is called the ridge board. It provides a surface for securing the top end of the rafters providing extra strength to the roof frame.
- Roof Pitch – The distance by which the roof rises for every foot of length is called the roof pitch. If the roof pitch is 6/12 and the rafters are 6’ it means that for every foot of the roof length the elevation of the roof increases 6 inches at the center.
- Gable Stud – The roof rafters are supported by small studs at regular intervals. These studs are called gable studs because their top face on which the stud plate is fixed is cut to for a slope based on the pitch of the roof.
- Fascia Board – This is a board attached under the edge of the roof sheathing and it extends beneath the sub fascia and soffit of the overhang of the roof.
- Sub Fascia – The sub fascia is a wide timber secured to the lower end of the rafters for closing the openings.
- Soffit – It is the material which covers the bottom of the overhang of thereof rafter. It’s generally made of a permeable material like vinyl for better air circulation.

Shed Blueprints – Most Popular
- Storage Shed Blueprints For Constructing A 8×10 Wooden Shed In today’s digital world, there are countless free shed blueprints and storage shed blueprints available in every shape and design possible. As time passes, the clutter in your home grows and starts becoming a problem in your daily life. This makes you take the decision of building a shed using shed building plans, for storing ...
- Shed Blueprints 10×12 – Plans For Building Your Lean To Garden Shed Are you looking for 10×12 shed blueprints for building that shed you’ve always wanted? Maybe you want a place to store all your gardening tools and lawn movers which have been lying in your garden for so long. You need to find some good quality garden shed blueprints before you can begin construction. Make sure you don’t ...
- Garden Shed Blueprints – Plans For Crafting A Gable Shed Once you have properly analyzed your requirements, your land and your budget, you will discover that constructing a garden shed using free garden shed blueprints is the perfect way to safeguard your outdoor tools and equipment. This storage shed can be constructed in a week and will be large enough to hold gardening tools, bikes ...

